
Are you having difficulty starting and running your leaf blower? Do you want to know how to safely troubleshoot the problem without any professional help?
If so, then this comprehensive guide is exactly what you need! Learn how to quickly diagnose and fix all common leaf blower issues so you can get back outside and keep your yard looking great.
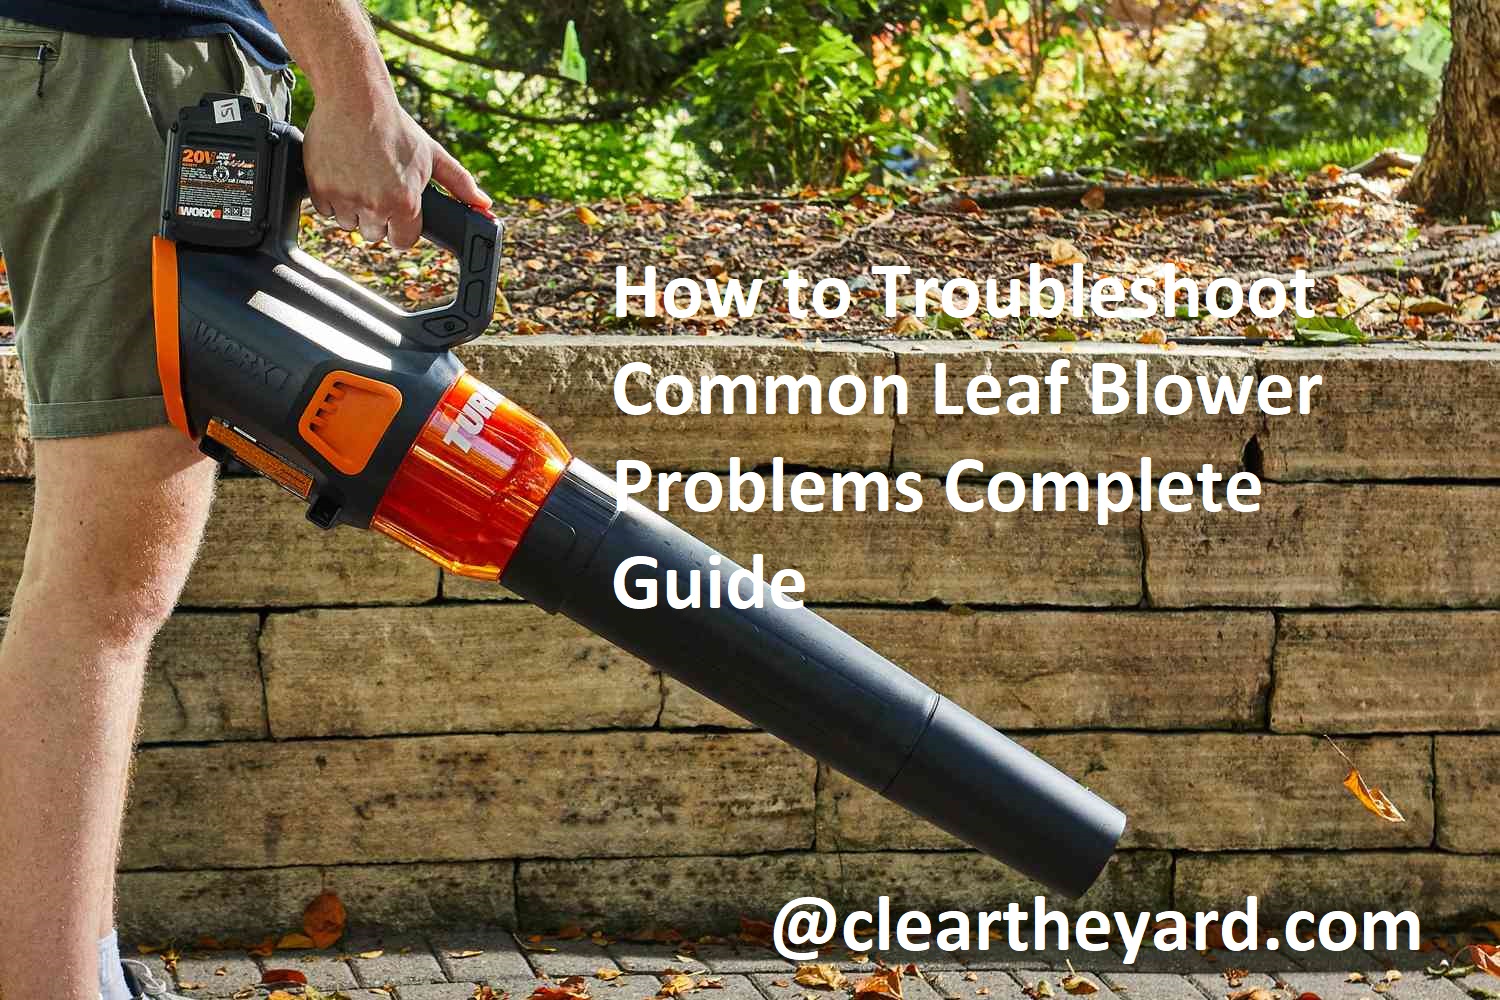
Welcome to this complete guide on troubleshooting common leaf blower problems. Leaf blowers are a great way to easily clean your garden, lawn and patio. However, like many other pieces of equipment, it can be prone to occasional issues and malfunctions. In this guide we will cover the most common issues and point you in the right direction for resolving them.
This guide covers all areas of troubleshooting leaf blower problems from diagnosis to the final fix. You will be guided through some basic steps with plenty of detailed information on where things can go wrong. You should have a good understanding of how your leaf blower should be functioning before you start any troubleshooting process so as to help identify any issues quickly and accurately.
Identifying the Problem
When trying to diagnose a leaf blower problem, it is important to identify the exact cause. To do this, you should start by carefully examining the leaf blower. Look for signs of damage or wear and tear, such as cracks in the casing or signs of rust. Also check for loose parts or debris around the engine housing that might be causing a clog or air leak. Additionally, listen for unusual noises coming from inside the leaf blower motor which could indicate an obstruction or corrosion.
After a thorough inspection, you can run an accuracy test with a voltmeter to verify that all electrical elements are functioning properly. You can also perform a static pressure check to determine if there is any restriction in the system, such as clogged exhausts and intakes. Once you isolate the problem areas accurately and correctly, you can begin troubleshooting using one of our repair guides below.

Understanding the types of leaf blower
When troubleshooting leaf blower problems, it is important to understand the different types of leaf blowers available. Leaf blowers can be powered by gasoline, electricity (corded or cordless) or battery and all may vary in terms of their size, design and power output.
The type of leaf blower you have will determine the maintenance steps required to solve common problems. This can range from checking the air filter on a gas-powered unit to replacing a battery in some cordless models.
Understanding your specific leaf blower model will help you properly address any issues you may experience while using it.
Common problems associated with each type
There are two types of leaf blowers: gas-powered and electric. Each carry different risks and require different maintenance and troubleshooting techniques. To ensure your leaf blower is working properly, it is important to take the time to understand each type’s common problems and how to address them.
Gas-Powered Leaf Blower Problems: The most common gas-powered leaf blower problems include issues with the spark plug, carburetors, fuel lines, air filters, recoil starter, or muffler. This can cause difficulty starting the engine or a lack of power when operating the machine. Checking for clogs in these areas is critical as well as making sure there are no damaged parts that require replacement or repair.
Electric Leaf Blower Problems: Electric leaf blowers tend to have fewer common problems associated with them. Common issues within electric motorized machines include faulty wiring connections due to overuse, improper storage and damage from use in wet conditions. Seeing smoke or sparks coming from the machine could indicate a shorted wire or broken motor parts requiring replacement. Regularly checking this type of equipment is key for optimal performance.
Inspection and testing techniques
When troubleshooting a leaf blower, your first step should be to inspect the parts to make sure that they are undamaged and in good working condition. This includes checking the drive cylinder, flywheel, exhaust port and spark plug. To check the function of each part, use the following basic testing procedures:
Drive Cylinder – Remove the cylinder cover and inspect the wall of the drive cylinder. The surface should be smooth and free of any wear or markings that might indicate damage or improper functioning. Also check for any breaking or wear on the connecting rod bearing or crank case gasket. If necessary, replace these parts before continuing your inspection.
Flywheel – Make sure that it rotates smoothly without any excess friction or grinding noises. Check for damage on edges and for grooves created by unbalanced propel design/manufacturing defects etc… Replace as necessary before proceeding with other inspection steps.
Exhaust port – Inspect for any obstruction from dirt or debris buildup, broken connections etc… If you find an obstruction, clear it away with compressed air before continuing inspection procedure.
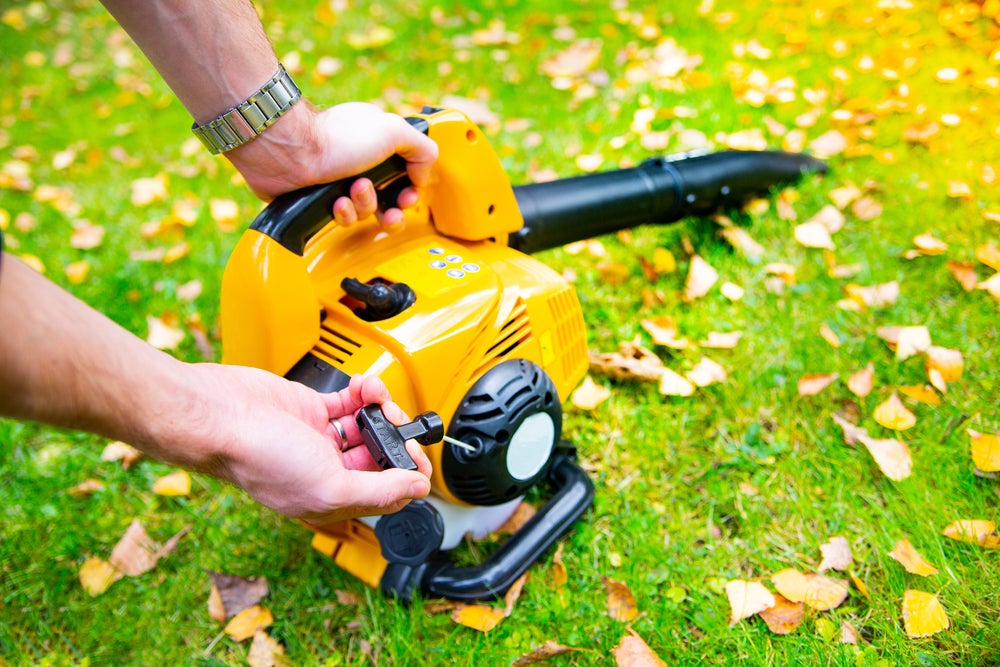
Spark plug – Make sure that all connections at ignition coil are securely tightened before conducting spark plug test using a spark plug tester (multimeter). Check for a spark gap of less than .020 inch (for most gas-powered engines) which is within factory specifications- a larger spark gap indicates poor engine performance while a smaller gap is indicative of fouled/overpowered ignition system settings.
III. Leaf Blower Maintenance
If your leaf blower isn’t performing as you’d like it to, it’s important to make sure that it is properly maintained. Regular maintenance can help extend the life of your leaf blower and allow it to perform better. This section will discuss the various components of a leaf blower, how to identify any potential issues, and how to safely maintain them.
It’s important to always check your user manual before attempting any maintenance on your leaf blower. Different models require different cleaning protocols, and following the instructions in your manual ensures that you don’t do any damage.
For all fuel-powered models, oil and filter changes should be done regularly. It’s also important to keep filters free from debris and dirt so that optimal airflow is maximized. Other potential maintenance needs include replacing spark plugs or removing debris from cooling fans or other ventilation holes.
In electric powered leaf blowers, typically the only maintenance required involves cleaning filters and ensuring there is no dirt buildup on the motor housing or inside ventilation holes. Also check for loose screws or other parts since some pieces may come loose over time due to vibration. Battery-powered models may also require occasional charging as well as cleaning of their contact points with a dry cloth if they become dirty enough that they don’t effectively contact the battery terminals anymore.
Maintenance checklist
Before you even attempt to perform troubleshooting, it’s important to ensure that the leaf blower is properly maintained. Below is a list of items to check before you begin:
- Check to make sure that the fuel tank has enough fuel for the job. If necessary, top up with a fresh mixture of unleaded gasoline and two-stroke engine oil in a 50:1 ratio.
- Consider replacing the air filter if it appears clogged or dirty, or if it has been some time since it was last serviced.
- Assess whether spark plug replacement is needed by examining its condition; it should have no soot on the electrode or ceramic element. When replacing, use genuine parts only and follow manufacturer guidelines stringently.
- If your leaf blower has recently been subjected to water damage, ensure all electrical connections are thoroughly dried with compressed air and corrosion-resistant lubricant before reattaching any parts.
- Finally, check if any moving parts are stiff or jammed; turn knobs slowly and carefully until they move freely again and use lubricant where necessary.
Regular maintenance tips
In order to ensure your leaf blower runs smoothly and efficiently, it is important to regularly maintain it. Here are a few tips on how to perform regular maintenance that will help you avoid common problems with your leaf blower.
- Clean the spark plug. If the spark plug is clogged with dirt or debris, the engine will not run properly. Therefore, use a wire brush or sandpaper to clean off any grime that has built up on the spark plug. Make sure it’s completely clean and replace if necessary.
- Change the air filter regularly. As air passes through the air filter, it becomes clogged with dirt and debris which restricts airflow and reduces efficiency of your leaf blower engine. Replace or clean out your air filter as needed in order to maintain proper performance of your engine.
- Check fuel system components for leakage, wear or damage on a regular basis and replace worn parts as needed in order to keep optimal fuel flow throughout your cooling system. Check all hoses, seals and gaskets for cracks, leaks or any other signs of wear and tear which can impair performance of your leaf blower engine if neglected for too long?
- Inspect connections for corrosion as well as tightness since loose connections can sometimes cause issues with starting up your leaf blower due loss of power connection up cables might have internal problems such worn insulations on wires so inspect them accordingly too!
Importance of maintenance
Carrying out regular maintenance on your leaf blower is important in order to keep it working properly. This includes checking any filters and replacing them if needed, cleaning the impeller and spindle fins, and checking for loose fragments in the fan housing.
It is also important to store your leaf blower correctly when not in use, making sure it is kept away from direct heat or excessive humidity. Properly maintaining and storing your leaf blower can help you avoid common problems and save you on costly repairs.
Common Leaf Blower Problems and Solutions
Common leaf blower problems can arise due to a blocked discharge tube, a defective fuel cap, a dirty air filter, or an engine problem. It’s important to identify the problem before attempting any repair. This guide provides easy-to-follow steps for troubleshooting and resolving some of the most common leaf blower issues.
Air Filter: A dirty air filter can reduce engine performance and cause smoke or oil to enter the combustion chamber. Check the air filter every few months and replace when necessary.
Carburetor: A defective carburetor may be responsible for poor engine performance or increased fuel usage. Use carburetor cleaning solution to restore normal engine operations and keep your leaf blower running correctly.
Spark plug: The spark plug is responsible for igniting the fuel in the combustion chamber of your leaf blower. Replace a damaged or worn spark plug with one that meets manufacturer specifications as soon as possible to ensure proper operation.
Fuel Lines & Valves: Worn fuel lines and valves can prevent your leaf blower from operating correctly and cause misfires, clogs, stalls, or poor performance in general. Inspect fuel lines periodically for wear and damage, and replace when necessary for optimal performance.
Discharge Tube: If not connected properly, a blocked discharge tube can prevent air from exiting the engine properly causing misfires, clogs, stalling or decreased performance from your leaf blower. Inspect regularly for obstructions such as leaves, weed fragments or other debris that could block air flow through the discharge tube.
Motor problems
A leaf blower is a valuable tool for removing fallen leaves, debris and other garden objects. However, as with all machines, it can occasionally experience some mechanical problems. Prolonged usage or excessive wear can affect the functioning of its motor and other internal components. To help you diagnose and remove common motor problems in your leaf blower, here are some tips to get you started:
- i) Check for a possible short circuit– The most likely cause of an abrupt motor failure is an electrical short circuit. Make sure to check any visible wiring for signs of overheating or malfunctions that might indicate a short circuit has occurred. Replace any frayed wiring and contact a technician if the issue persists.
- ii) Check if the carbon brushes are worn out– Carbon brushes can wear out over time with regular usage; when this happens, they start to lose grip on their surrounding metal surfaces which causes them to spark less and start eventually fail leading to complete motor failure. Inspect your brushes regularly for buildup or wear; replace them with new ones if necessary to keep them in top shape.
iii) Inspect other components– Apart from the carbon brushes, certain parts such as rotor springs, flywheel magnets, capacitor spots on the fan’s surface can malfunction too; inspect all these parts regularly to ensure proper functioning of your leaf blower’s motor.
Starter problems
If your leaf blower won’t start, it may be due to several different issues. The most common starter problems with leaf blowers include a dead battery, bad spark plug, or clogged carburetor. If you’re having trouble starting your machine, it is best to determine which of these is the culprit before attempting any repairs.
A battery malfunction can be diagnosed by testing for voltage with a multimeter and/or attempting to jump-start the machine from another vehicle’s battery. If the issue appears to be a bad spark plug, replace it with a new one and then test for spark on all cylinders with a spark plug testing tool. Lastly, if your leaf blower has been sitting for an extended period of time without use, then its carburetor may need to be looked at and cleaned out.
Once you have identified the root cause of your problem and successfully completed the appropriate repairs or replacements, you should be able to start your leaf blower again without further difficulties. And when in doubt about any repair work needed on your leaf blower, always seek advice and assistance from experienced professionals in order to ensure that all proper procedures are followed when troubleshooting any machinery or equipment failures.
:max_bytes(150000):strip_icc()/SPR_GroupShot_RM_5176-cf2f710f848649b89c44055dc2631ee4.jpg)
Conclusion
We hope this guide has been helpful and informative in troubleshooting common leaf blower problems. Keep in mind that a variety of issues can cause problems with a leaf blower and that more serious repairs may need to be carried out by an experienced technician.
As always, we recommend taking preventative maintenance measures, such as servicing your machine regularly, to help keep it in good working order. If you’re still questioning the solution or want to take extra precautions, always consult a leaf blower service manual or seek advice from a professional technician!
FAQ’s
How do you diagnose a leaf blower that won’t start?
To diagnose a leaf blower that won’t start, you should check the fuel tank, fuel filter, carburetor, spark plug, and ignition coil for issues.
Why does my leaf blower keep stopping?
Your leaf blower may keep stopping due to issues with the carburetor, fuel filter, spark plug, or air filter. It could also be due to overheating or low oil levels.
Why is my leaf blower not blowing leaves?
If your leaf blower is not blowing leaves, it could be due to a clogged air filter, a malfunctioning fan, or a broken impeller.
Why did my leaf blower stall and won’t start?
A leaf blower may stall and not start due to issues with the carburetor, spark plug, or ignition coil. It could also be due to clogged air filters or fuel filters.
What causes blower failure?
Blower failure can be caused by a variety of issues, including worn bearings, damaged impellers, motor issues, or electrical problems.
Why does my blower motor sometimes not work?
A blower motor may sometimes not work due to a faulty resistor, a broken fan, or a damaged motor.
What happens when blower motor stops working?
When the blower motor stops working, the HVAC system will not be able to circulate air properly, which can lead to poor heating or cooling performance.
Why is my leaf blower sputtering?
Your leaf blower may be sputtering due to issues with the fuel mixture, air filter, or spark plug.
How do you reset leaf blower?
To reset a leaf blower, you should turn off the engine, disconnect the spark plug wire, wait a few minutes, and then reconnect the spark plug wire.
What is the maintenance of a leaf blower?
The maintenance of a leaf blower includes regularly checking and cleaning the air filter, fuel filter, and spark plug. It also involves changing the oil and fuel mixture, as well as inspecting the impeller and fan for damage.
See Also :
- Best leaf blower mulcher 2023
- Best commercial backpack leaf blower 2023
- Best husqvarna leaf blower 2023
- Best dewalt leaf blower 2023
- Best backpack leaf blower 2023